Bronze Archives | Estate Fountains

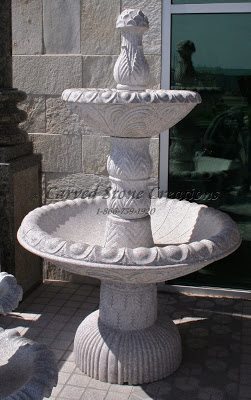
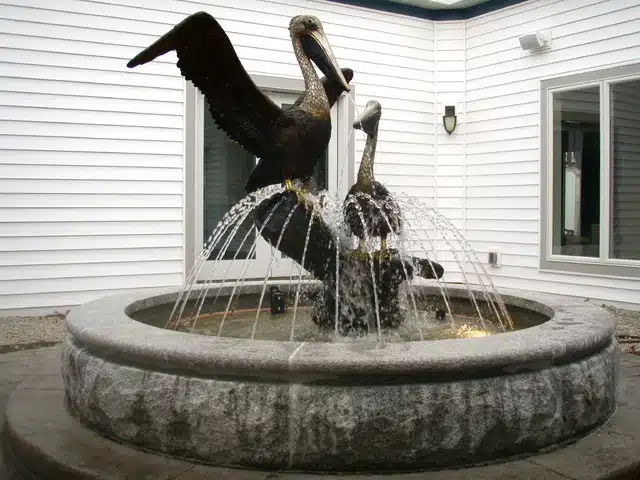
A bronze fountain is a perfect way to add timeless class to your garden. No matter the size of your outdoor space, a water feature adds a unique style that’ll impress. However, when you invest in such a stunning landscaping feature, you’ll want to make sure it’s noticed.

Create your landscaping designs with these hot tips to avoid losing the striking effect of your unique fountain feature.

3 Tips to Turn Your Bronze Fountain into a Stunning Garden Feature

Simple, yet effective, these three tips will highlight your fountain as a key feature in your landscaped garden.

1.Clear the Space

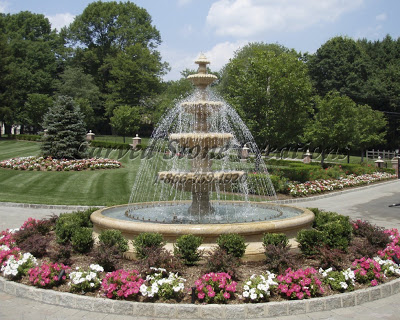
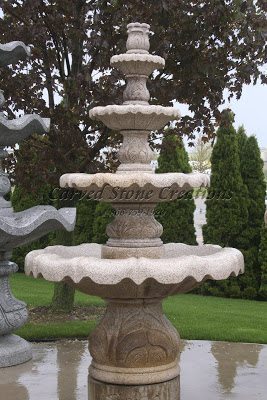
Avoid hiding your fountain behind lots of foliage. It deserves pride of place, so clear the area around the pedestal and bronze figures to make sure the fountain stands out at every angle.

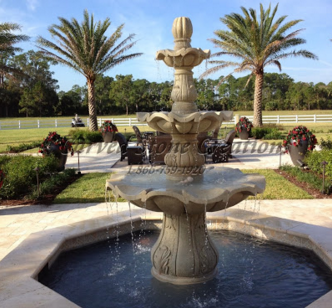
Fountain features work well placed on wide pathways that allow people to step back and admire the sculpture. Keep border shrubs low to create a visual contrast in feature heights and really make your outdoor fountain stand out.

Consider making the space around your fountain more inviting by placing a seating area nearby. This will allow people to view and admire the feature, as well as take on the calming benefits of listening to running water.

2. Light It Up

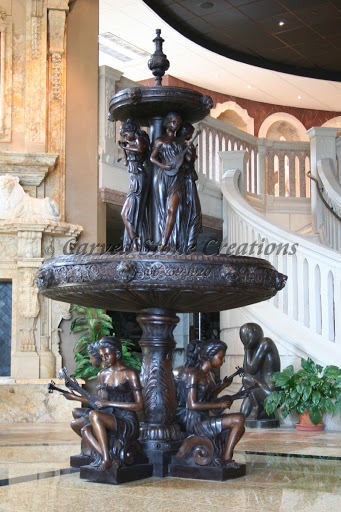
Your fountain deserves to be seen at every hour of the day. Invest in garden spotlights angled towards the feature to make sure it is just as stunning at night as during the day.

Use warm and neutral LED lighting, compared to a cooler color temperature, to magnify the natural warmth of the bronze features.

Light from a range of angles, too. This will ensure the full fountain features can be seen at night, with none of the intricate details lost in darkness.

You can even lead the way to your fountain feature in your landscape garden by lighting the pathway with inviting spotlights or subtle string lights in the foliage.

3. Use Subtle Pointers

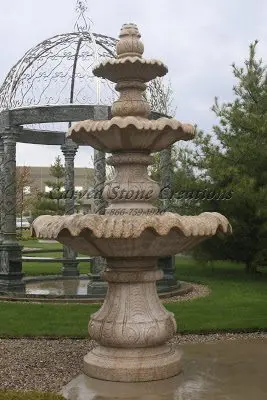
Use features in your overall landscape design to lead people towards your fountain feature, both physically and visually. Inviting pathways encourage people to walk up to your water feature. You can also use foliage – and the absence of it around the fountain – to create a contrast in visual texture.

Archways, garden seats, and subtle lighting can also be used to create a natural path that draws people towards your garden fountain. You could even use figure statues to gently guide the way as they face towards, or point to, the water feature from afar.


Use a Custom Design for a Truly Unique Feature Fountain

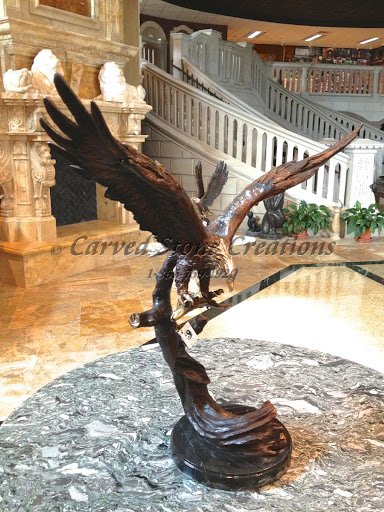
Landscaping is an extension of your personal style, so it’s important to find a bronze fountain that reflects your unique taste.

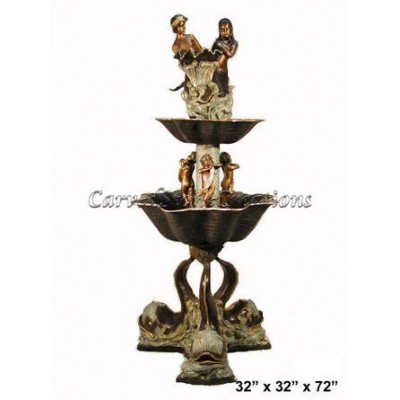
From wildlife-inspired figures to Renaissance cherubs or minimalist sculptures, a custom design is guaranteed to be an attractive centerpiece for your garden landscape.

Talk to us today about your vision and see how we can work with you to create a stunning fountain that makes your dreams of a perfect garden a reality.


3 Tiered Fountain Styles

July 6, 2016

From small to large and simple to intricate, tiered fountains are filled with endless beauty. These fountains vary in sizes and stone types and last for generations. Take a look at a few different tiered fountain styles for your landscape or garden:

Two-Tiered Fountain


The egg-dart self- contained two-tier fountain on the left is the definition of elegance! This fountain complements any landscape with its intricate acanthus carvings on the pedestal and base. Another two-tier fountain style is the mermaid fountain with a classical dolphin pedestal. This fountain is a tribute to the sea, and includes two mermaids with clam shell bowls. It is sure to bring unique beauty into your home with a mystical feel. 


Three-Tier Fountains

You can never go wrong with a classic! This classical three-tier fountain pictured on the left is handcarved from Giallo Fantasia granite and gives a tropical feel with the pineapple resting on the top. The bubbling water gently flows down this fountain, leaving you feeling at peace. Another three-tier fountain option is the three-tier scalloped fountain. It is handcarved from Golden Cypress granite with stunning carvings on the rim of the fountain bowls. 


Four-Tier Fountains

Making a grand statement in your garden just got a lot easier! The fountain pictured on the left is the four-tier acanthus fountain, which is featured in Giallo Fantasia Dark granite. This fountain features acanthus leaf carved details and a petal-like detail around the basins. The elaborate design highlights any garden or landscape feature and serves as a striking centerpoint. Another unique design is the tall four-tier fountain handcarved from our Giallo Fantasia R granite. This masterpiece includes classic scroll work carvings. It is paired with a 12” diameter fountain pool surround and also features a spray ring that creates a waterfall look that is one of a kind. 


If you see a tiered fountain that has caught your eye, contact us today! 

Sign up for our free Photoshop Presentation to see your dream fountain in your landscape.  Simply send us a photo of your home or garden, then tell us your favorite fountain and we will put the two together for you!


How to Care for Your Bronze Piece

October 19, 2015

Bronze is an exquisite material for sculptures and fountains. Learn how to care for your bronze display to preserve the natural beauty of the material. 

The good news is bronze doesn’t need too much care or maintenance. Regular cleanings will keep your piece in good shape.

One of the most important things you can do to take care of your bronze piece is remove the dust regularly. Dust buildup can cause the wax coating to wear off quicker than normal. You can use a soft cloth or brush to wipe off the loose dust. You can also use the brush attachment on your vacuum cleaner to remove the dust. 

Don’t use abrasive cloths or brushes to remove the dust, they may scratch the surface or remove the protective wax coating.

If your bronze piece has a grimy film that normal dusting won’t remove, you may need to complete a more intense cleaning process. To clean off the film, use a simple soap and water mix. 

Choose a soap that is mild and free of scents (especially lemon scent). Certain scented soaps can have other abrasive additives in them that can be harmful to the bronze. Only use a few drops of soap to loosen up the grime. Always test a small, discrete area of the sculpture with the soap and water mix before wiping down the whole sculpture. Once the whole piece is wiped down with the soap, rinse out the rag with clean water and wipe it down again with plain water. Use a soft toothbrush to clean out intricate details. 

After a thorough cleaning, a new coat of wax should be applied. Wax protects the surface from oxidation and gives the piece a luster look. Before applying the wax, make sure the piece is completely dry. If you apply the wax while the bronze is still wet, the moisture will be trapped between the bronze and the wax. 

Plain clear paste wax is recommended for the best results. Apply the wax with a clean, soft rag. Make sure to only apply a light coat and allow it to dry completely before buffing it out with a new clean cloth. For outdoor sculptures, we recommend applying a second coat of wax. 

As a general rule, keep the cleaning process simple. Avoid abrasive polishes, brushes, chemicals and oils as they can damage, scratch or even remove the natural patina of the sculpture. Stick to soft cloths and mild soap and water to clean your sculpture.  

If you would like more information about caring for your bronze sculpture, please contact us


Lost Wax Casting Of Bronze

February 6, 2009

Carved Stone Creations works with expert bronze foundries who are skilled in making bronze statues through the process of Lost Wax Casting. Lost wax casting is the process by which bronze is cast from an artists sculpture. This is the most precise metal casting technique in existence, ensuring accurate reproductions of the original sculpture and exquisite detail. Developed over 4,000 years ago, this ancient practice varies from foundry to foundry, but the steps which are usually used in casting bronze sculptures in modern bronze factories are generally standardized.

  1. Sculpting An artist creates an original artwork from wax, clay, or another material.
  2. Mold making A mold is made of the original sculpture. Most molds of small sculptures are made from plaster. To preserve the fine details on the original artwork’s surface, there is usually an inner mold made of latex, vinyl, or silicone. Usually, the original artwork is destroyed during the making and initial deconstruction of the plaster mold.
  3. Wax Once the plaster-and-latex molds are finished, the first layer of wax is applied by painting into the rubber mold to capture fine detail. Then more molten wax is poured into it, enough to cover the inner surface of the mold.
  4. Removal of Wax The hollow wax copy of the artwork is removed from the mold. The artist may reuse the mold to make more wax copies, but wear and tear on the mold limits the number of copies possible.
  5. Chasing A heated metal tool is used to rub out the marks that show the “parting lines”, where the pieced of the mold came together. The wax now looks like the finished bronze, exactly like the original work. Wax pieces that were molded separately can be heated and attached.
  6. Spruing The wax copy is “sprued” with a tree-like structure of wax that will eventually provide paths for molten bronze to flow and air to escape. When the wax is “lost”, these gates will become the avenues for the molten metal to flow into the piece. The vents allow the gas to escape when the molten bronze is poured and will prevent air pockets from forming. The carefully planned spruing usually begins at the top with a wax cup, which is attached by wax cylinders to various points on the wax copy.
  7. Slurry A “sprued” wax copy is dipped into a slurry of liquid silica, then into sand-like “stucco”. The slurry and grit combination is called a “ceramic shell” mold material. The shell is allowed to dry.
  8. Burnout The ceramic shell-coated piece is placed in a kiln where heat hardens the silica coating into a shell, and the wax melts and runs out (“lost wax”). Now all that remains of the original artwork is the negative space.
  9. Testing The ceramic shell is allowed to cool, then is tested to see if it will hold water. Cracks and leaks can be repaired at this time.
  10. Pouring The shell is reheated in the kiln to harden the patches, and then placed into a tub filled with sand. Bronze is melted then poured carefully into the shell. If the shell were not hot, the temperature difference would shatter the mold. The bronze-filled molds are now allowed to cool.
  11. Release The shell is hammered or sandblasted away, releasing the rough bronze. The spruing that were recreated in metal are cut off to be re-melted and used in another casting.
  12. Metal Chasing For large pieces, reassembly will take place in the welding area by carefully realigning and refitting the pieces. The bronze copies are chased until all the signs of casting are removed, and again the sculpture looks like the original artwork.
  13. Patinazation The bronze is colored using chemicals applied to heated or cooled metal. This coloring is called patina, and is often green, black, white, or a brownish color to simulate the surfaces of ancient bronze sculptures. A patina finish can also replicate marble or stone. Depending on whether the metal is sandblasted or polished the finish can be opaque or transparent. After the desired patina has been achieved, a coating of wax is applied to the surface while it is hot in order to ensure durability of color and finish. This serves to protect the surface from oxidation and also gives the finished bronze its luster.

Contact us or call us at 1-866-759-1920 if you would like more information or a price quote on any custom bronze piece for private gardens to large public memorials.