Technical Archives | Estate Fountains

Types of Water Fountain Pumps

The two main types of fountain pumps are submersible and non-submersible. Each water fountain pump serves certain advantages depending on the application and usage. 

Submersible Pumps

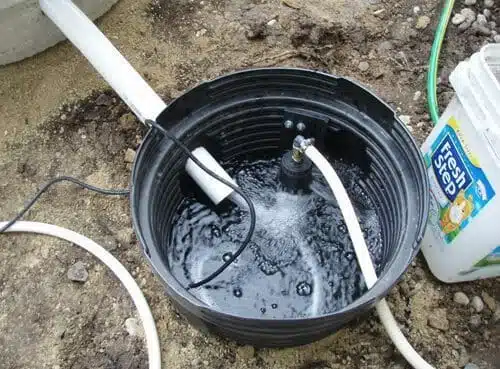
The submersible fountain pumps are designed to be fully submerged underwater  and need to be in order to keep them from overheating and burning up. These fountain pumps are directly placed into the fountain, pond vault, or in a skimmer box. The submersible pumps range from fifty to ten thousand gallons per hour (GPH). Submersible water fountains are easy to install and are an economic breakthrough for small fountains or ponds. 

Pumps for small fountains can handle up to one thousand gallons of water. Submersible pumps are quiet in their work and can also drain the ponds and fountains. If you are keeping fish, plants, or other aquatic life in your fountain, you should go for the model that does not use oil because seal breakage can pose severe risks for the organisms.

Non-submersible Pumps

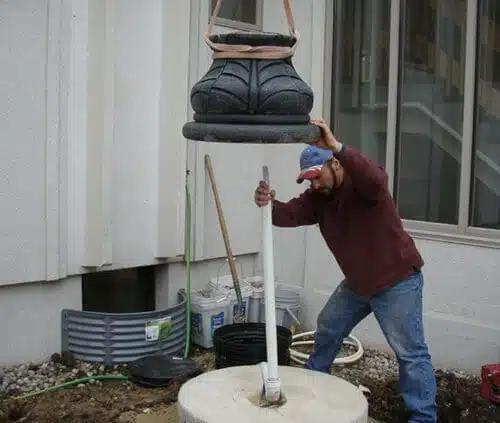
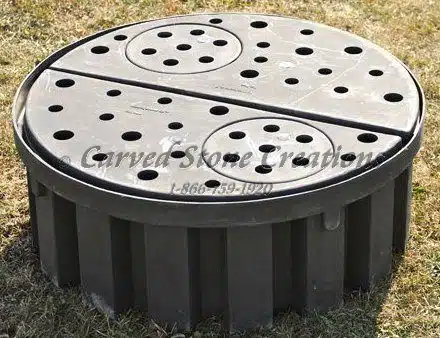
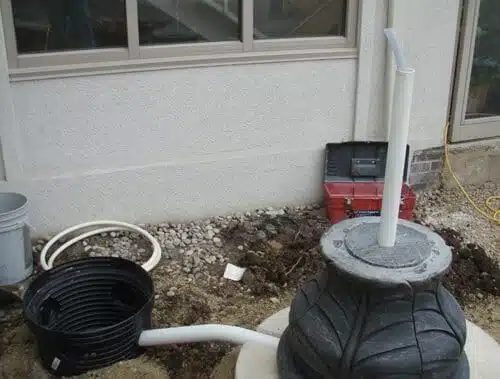
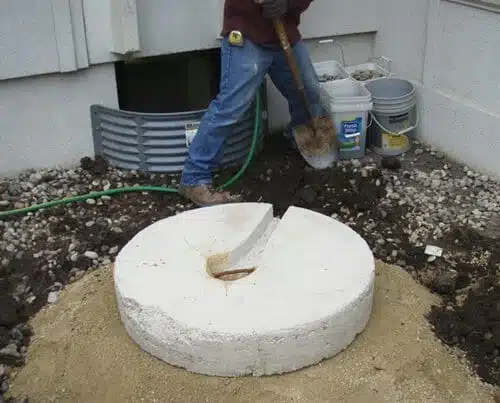
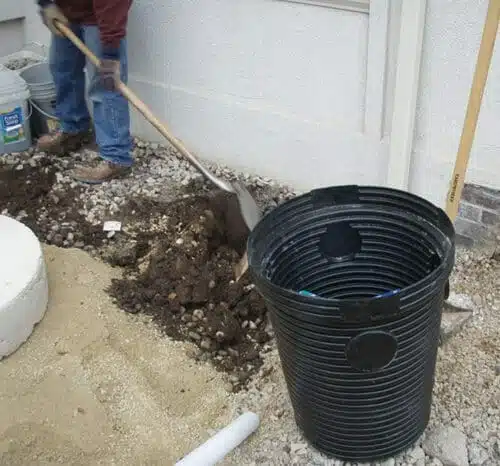
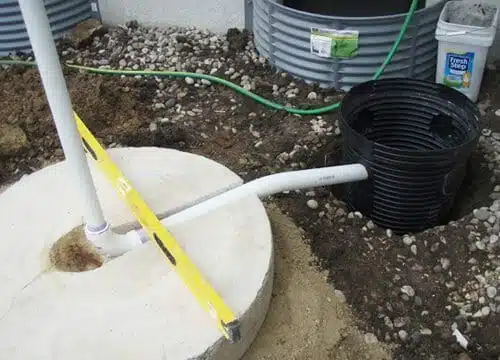
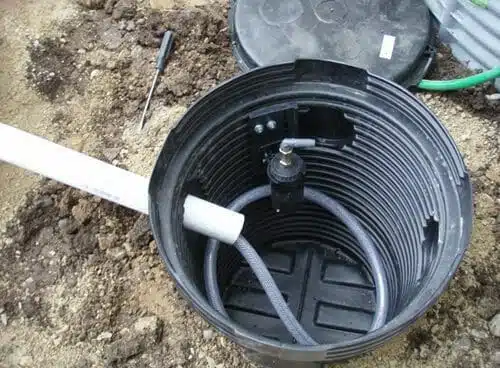
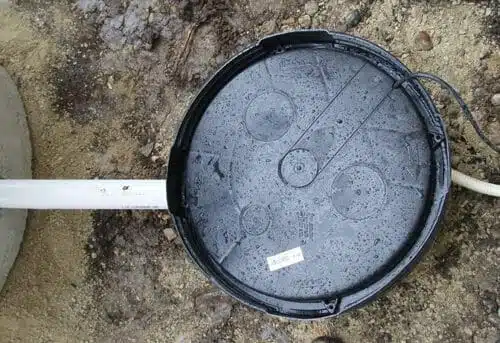
Non-submersible pumps are efficient in energy consumption and are a reliable option. These pumps are to be installed in a dry location near the fountain. Typically in our fountain installations, a non-submersible pump is placed in an underground vault adjacent to the fountain and used in commercial installations, or in instances, you do NOT want a pump visible in the fountain pool, for hooligans to possible mess with or break, or children to trip over in wading in the fountain. 

Non-submersible pumps are in the open and can be louder when in action. These pumps are more complicated to implement and install than a submersible pump. Both kinds of pumps need to be cleaned/maintained during the fountain season though. And the easier thing about a submersible pump is that you can visually see the pump in the pool, and therefore know when it’s starting to get covered with chalky calcium scale on the outside of the pump. (As that is indicative of what’s also likely occurring INSIDE the pump, where it matters!) So, if it’s turning white on the outside of the pump – that’s your queue to take the pump out and clean it (inside and out) before the impeller seized up inside the armature (armature being the cup that the impeller spins in to push the water.) 

How Big You Should Go

The average working life for a small fountain pump is one to three years, but the working duration can be prolonged by upkeep and proper maintenance. (Vs. many of our larger pumps last much longer with good care though. The longest-lasting so far in one of our fountains was about 9 years before the pump had to be replaced.) The secret of having a perfect outdoor or indoor fountain is water quality and pump maintenance.  

Maintenance is different for indoor and outdoor water fountain pumps, and it is common sense to take care of the element that makes your fountain beautiful and worthy. Outdoor fountain pumps need periodic cleaning because they are more likely to be clogged with debris. Therefore, sand, dirt, leaves, grass, etc., should also be wiped regularly from the fountain to keep it clean. 

Similarly, indoor water fountain pumps don’t face harsh weather conditions, but those pumps also need cleaning over time, just based on the quality of water you are filling your fountain with. Depending on the style of the fountain, you may also need to adjust the noise levels to produce the most harmonious sounds coming from the water fountains.   

Caring for Fountain Pumps

We have mentioned some guidelines for water fountain maintenance:

Make sure your outdoor submersible fountain pump is completely submerged in water.  

Keep the pump clean from buildup and debris.  

Keep the water fountain running at all times if possible.  

Use distilled water for small fountains, as it makes maintenance easier.  

Clean your fountain pump regularly.  

How to Choose a Fountain Pump

Selecting the right size pump for your fountain involves many factors apart from the design or style. The factors that need to be considered for the correct fountain pump size are listed below:
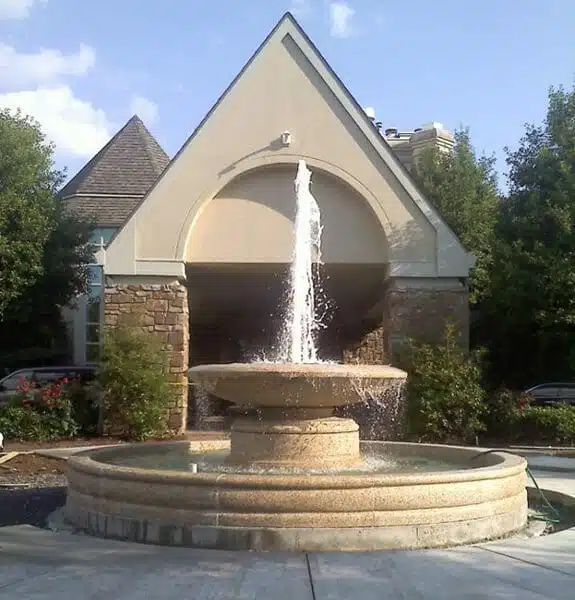
Head Height

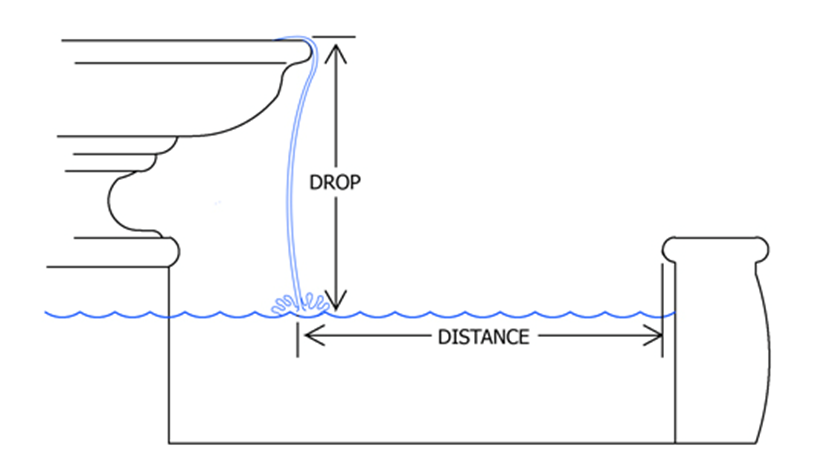
Maximum lift and head height rating are essential factors when sizing a pump. (Essentially the listed “head height” for a particular pump means that’s the max height it’ll pump water above the pump – before the water just stops moving completely.) 

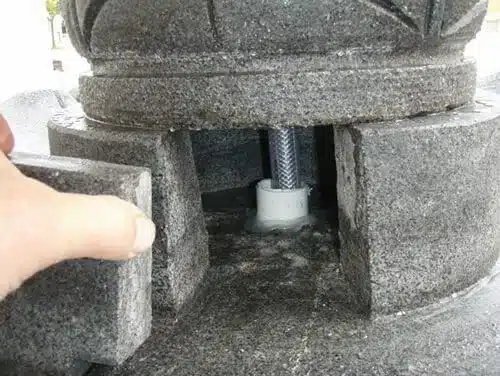
To measure the needed head height rating of the fountain, track where the fountain pump rests if its housing unit if it isn’t at the fountain base. Measure the height from where the fountain pump rests to the top where the spout or finial would be pouring water – at its highest part. This height will help you determine which specific pump would be appropriate for your fountain, based on its listed “head height.” 

Controlling Water Flow

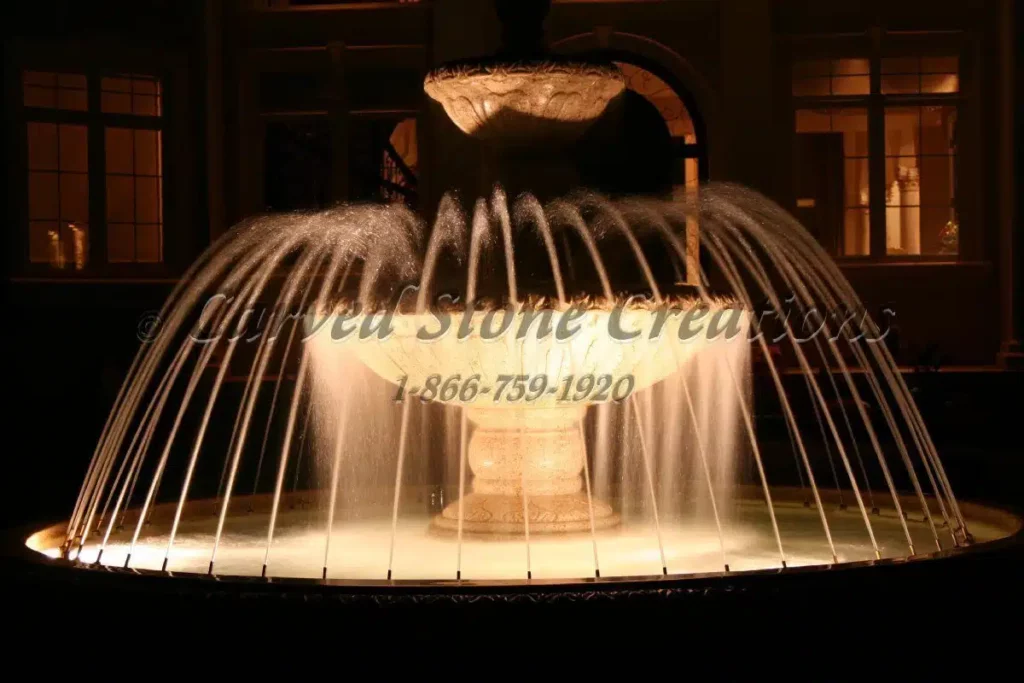
If you want the water to fall from the fountain spout gently, the pump head height should be just a bit taller than the vertical height of the fountain. Select the pump with a max height of several feet TALLER than the fountain finial for the intense gushing of water from the fountain spout

We can also use a valve or a flow reducer at the discharge point in the spout if you want to reduce the flow to just a trickle for a relaxing and attractive sound during social gatherings. The trickle produces a delightful sound from the water fountain, which might normally sound more like rushing water in a pounding rainstorm.  

Calculating the Water

If you are not sure about the water capacity of the fountain or pond, you’ll need to figure it out. Knowing your fountain’s gallon capacity will help you choose the ideal and the best-suited fountain pump for your fountain. 

First, measure the fountain’s length then multiply by the depth and width. Once you have the cubic inches/volume, divide that number by 231 to get the number of gallons of water in your pool. Or, if you would rather start with cubic feet, then multiply that number by 7.481 to get the number of gallons in your pool.

Things to Consider When Choosing a Pump 

Before purchasing any product, we consider some factors in determining the right product for our application. Below we have listed the factors to consider while purchasing a fountain pump that works best for you: 

Flow-rate

It is the effectiveness and efficiency of the fountain pump. Flow rate is how much time a water fountain pump takes to move a certain amount of water through your fountain. The amount is usually measured in gallons per hour here in the US, or gallons per minute, if it’s a very large/powerful pump. 

Pump Quality

What matters is the brand of the water fountain pump. You need to go through necessary surveys, reviews, and research to analyze and determine the quality of the fountain pump. In our eyes, if a pump has a 3 year or 5-year warranty, you are pretty assured it’ll last quite a bit longer than the pumps that only have 90 days or 1-year warranty… (Of course, this is assuming you maintain and clean the pump as needed during the fountain season, as having a dirty pump that seizes up & stops working is never a situation the pump manufacturer will warranty.)  

Conclusion

Pumps are much more than the majestic gurgling beasts they appear to be. They have the potential to help you optimize your fountain in terms of its beauty, sparkle, and water quality, saving you time and energy. 


Pondless Water Feature Installation

March 16, 2016

Pondless water feature fountains are a wonderful addition to any landscape. They don’t require a visible pond or basin, but instead recirculates water through a hidden basin. The tranquil sound of water trickling down the fountain is relaxing as well as elegant. The process of installing a pondless water feature fountain is not as difficult as you may think when you have Carved Stone Creations at your side. We divide the process into a number of steps that are easy to follow and completed in a timely manner. The project we’re highlighting was one done in less than a day. We arrived for installation in the morning and were finished by the afternoon. Here are the steps to our pondless water feature fountain installation process:

First, you pick the location of where you want your beautiful pondless water feature to be installed. We begin by digging a hole for the basin to sit in. The hole has to be wide and deep enough to hold the vast supply of water. 

Once the hole for the pondless water feature is dug, we make sure the base of the hole is flat to ensure the basin sits level. After this is completed, we place the pondless basin into the hole. The basin and the pump get installed along with the base of the outdoor fountain. 

Then, we drape the outdoor granite fountain in a rubber fabric. The fabric is then spread out over the area of the fountain. The purpose of the fabric is to catch the overflowing water from the three-tiered outdoor granite fountain. 

Once these steps are completed, a lift is used to place the first tier of the fountain onto the base. This is a very important step to ensure that the tier is placed level onto the granite base.  To check for level, fill the bowl with water. Once water begins to flow over the scalloped edges, check to see that the water flows over all sides evenly.  This can be adjusted by placing rigid plastic shims under the side where there is greatest water flow. This should be completed for each tier.

Once all of the tiers are put together, we turn on the fountain and let the water run for a while. This allows us to test the fountain to make sure the pondless basin returned the water correctly and everything is going according to plan. 

After the fountain is tested, we begin the next step of adding stones around the fountain’s base to hide the rubber fabric. Once we finish this step, the intricate fountain is ready to use and show! As seen in the picture below, this was our completed project. Not only is the architecture of the three-tiered fountain beautiful, it adds elegance to the landscape! There are many benefits of pondless water fountains, such as saving space from creating a pond and minimal maintenance requirements. The beauty and the benefits of pondless water fountains make it difficult to turn one down for your own home. 

Are you interested in a pondless water feature installation for your home? Contact us today! 


5 Questions You Need to Ask to Choose the Right Water Fountain Pump

April 1, 2015

There is no denying the beauty and elegance a fountain brings to a landscape.  However, when it comes to the technicalities of choosing and installing the right water fountain pump, many find themselves in unfamiliar territory.  With so many fountain pumps to choose from, how do you know you are choosing the right one?  

When determining what fountain pump you will need, there are 5 questions to ask:

1. How large is the fountain you want to run (Total Height & Bowl Diameter) and how high do you want your fountain to spray?

There are 3 main factors that determine fountain pump output: the water volume, the height of the water spray and the water pressure needed to accomplish that height.  By finding a pump that will work in its peak efficiency curve while simultaneously meeting the fountain’s operating criteria will help to extend the life of the fountain pump.

2. How far will the water drop from its maximum spray height to the pool below?

Any spray or spillage is a byproduct of the distance the waterfalls to return to the pool.  The longer the distance, the more likely water will spray or spill over the side.  At first glance, a surround may seem large enough to contain spillage, but in reality, it still might not be an adequate size.  You must consider the fountain’s Splash Factor, which, luckily, is easy to calculate.

To determine the Splash Factor, measure the distance which water will fall to return to the pool.  Compare this to the distance from the water to the edge of the fountain surround.  The distance to the pool surround should be greater than the height of the drop to the pool.  

You can also minimize spray is by angling spitters toward the pool.  This will cause falling water to hit the pool at an angle rather than vertically, reducing splashing. So select a water fountain pump according to water spray size.

3. Will your fountain contain multiple spitters, tiers or bowls?

Some fountains require additional water lines to feed water to features.  If a fountain has multiple water features, it may require additional pumps. 

4. Do you want to include multiple spray nozzles or a spray ring?

Spray rings are a fantastic way to draw attention to your fountain. You can accent your fountain by adding a custom copper spray ring that uses adjustable brass spray nozzles.  If you are considering a spray ring, it’s important to note that large spray rings may require multiple water inlets and pumps to properly modulate the pressure in the ring.  

5. How will your pump be powered?

There are 3 ways a pump can be connected: 

  • With plugging directly into a nearby external GFI outlet or timer.
  • By a traditional 120v power cord run up through the bottom of the fountain slab and coupled to the pump with an underwater disconnect waterproof power cord coupler. 
  • Use hard-wiring into an underwater junction box.

 Only the first two options allow you to remove the pump without first having to drain the water out of the fountain.  

It’s also possible to connect your pump to a breaker.  This gives you the ability to connect an on/off switch or even a timer for your fountain.  In order to do this, we typically consult an electrician at the fountain installation.   

Once these 5 questions have been answered, you will be another step closer to choosing the perfect pump for your fountain.  

If you have detailed questions about choosing the perfect pump for your fountain, feel free to contact us.  We carry a selection of commonly used fountain pumps, or, if you’ve determined you will need a specific kind of pump, we can also source other pumps.  Just contact us.


Natural Stone Facts

October 29, 2014

Natural stone is an ideal choice for many fine home finishes.  There are several types of natural stone out there; each gives a different look and has different properties. This article highlights a few of the most popular natural stone types and facts about each type.

Granite

Granite is one of the most popular natural stone types. Many people choose this stone because it is very durable. Granite is one of the hardest, densest natural stones making it the best choice for outdoor fountains in freezing climates.  It is also very resistant to scratches and staining and can withstand high heats; making this stone ideal for use in the kitchen. Granite also comes in many different colors, from light to dark, with unique variations in each variety. Check out some beautiful granite samples below.

Gaillo Fantaisa Y Granite – Its warm golden/tan earth tones work well in many landscaping applications.

Golden Cypress Granite – Closely resembles the fine-grained texture and color tones of a buff limestone but with the durable characteristics of granite.

Louise Blue Granite – Considered a premium exotic stone, showcases the wild variation in colors and texture available to those seeking something truly unique.

Marble

Marble is a crystallized limestone. This beautiful stone has been popular in homes for centuries because of its elegance. Unlike granite, marble is softer and more porous. This allows for a greater level of detail in the carving.  It tends to stain and scratch easier than other natural stone types, so it is best used in an area in your home with less traffic. Some of the most popular places to use marble are for statuary or columns, or in guest bathrooms and fireplace surrounds. Like granite, marble comes in a variety of colors, each with distinct veining. Below are some marble examples.

Crema Marfil Marble Fireplace

OLYMPUS DIGITAL CAMERA

Cumulus White Marble Contoured Oval Bath Tub

/

Travertine

In its natural state, travertine is a porous stone with holes running through it.  On floor tiles and countertops, holes are often filled and the stone is honed to the state you see in homes. Like marble, travertine is soft, so some preventative maintenance is needed for this type of stone to keep it looking nice. Travertine works great for many uses in the home as long as it is properly maintained. Below are some popular travertine colors.

Scabos Travertine flooring in a Versailles pattern

Travertine Fireplace with polished marble inlays

Limestone

Limestone is a unique natural stone. It is a sedimentary stone formed from the accumulation of organic materials like shells and coral at the bottoms of ancient sea floors.  Like marble, this stone is very porous and will require some preventative maintenance. Also like marble, this stone is susceptible to staining and scratching, so it is not suitable for all areas of the home.  Check out a beautiful limestone sample below.

Limestone Kitchen Hood

Limestone Stair Treads and Curved Balustrade

These are just a few of the different types of natural stone available. For more stone samples, click here

Interested in learning more about using natural stone in your home? Contact us


5 Stone Care Tips

August 5, 2014

When you invest in something beautiful made out of natural stone, of course you want it to stay looking beautiful for years to come. Read the top five stone care tips below to learn what you can do to keep your stone investment looking great.

1.Know your stone

Before you can even think of cleaning or caring for your stone you need to know what type of stone it is. Natural stone can be classified into two different categories. It is important to know what type of stone you have, so you can use the proper cleaning products. The two categories are:

•Siliceous Stone: This stone is made up of silica or quartz like particles. Some examples of siliceous stones are granite, slate, sandstone, brownstone, bluestone, and quartzite. This type of stone is typically quite durable and easy to clean.
•Calcarous Stone: This stone is made up of calcium carbonate. Some types of calcareous stones are marble, travertine, onyx, and limestone. Calcarous stone is typically less durable and requires special cleaning products.

2.Use Coasters & Trivets

Think twice before setting your drink down without a coaster underneath it. Citrus juice and alcohol can specifically be quite abrasive on your stone. If some spills out from your cup, the coaster will protect the stone. Also, before you set a hot pot or pan down on the stone think about using a trivet. Although most stones can handle the high heat, the use of a trivet will help to keep the stone looking beautiful for longer. 

3.Use Proper Cleaning Products

Now that you know what type of stone you have, you should be able to determine a type of cleaner that should be used. Make sure to use the proper cleaner on your stone type to keep it looking beautiful.

4.Sealing

Sealing is done on some types of stones to help repel stains. Remember that sealing doesn’t make a surface “stain proof” but it can help to make the surface resistant to stains. Some stones don’t require sealing, but if your stone does require some sort of sealant it is best to apply one to keep the stone looking great for years to come.

5.Care for Stains Promptly

If you spill something or notice a stain on your stone, the best thing to do is care for it as soon as possible. The longer it sits on the stone the harder it will be to get out. Depending on the type of stain or spill, you will have to care for it differently. Identify the type of stain and care for it using the proper cleaning method. 

By caring for your stone properly, you will help it to stay beautiful for years to come. 

Download this handy stain removal guide for more information. 

Have a question about caring for your stone investment? Contact us


Visualize Your Fountain

April 16, 2014

Have You Ever Dreamed of Having a Fountain on Your Property?

Designing a fountain is much like creating a work of art. Outdoor fountains make a graceful statement about a home by creating a pleasing and welcoming ambiance. They enhance the landscaping style of any property. Outdoor fountains are especially beneficial serving as camouflage for traffic noise and other nuances. They can be designed to swim in which can provide relief on a hot day.

Do you stand out from the rest of your friends? Does your landscaping?

We offer a wide variety of styles which will be sure to impress anyone who enters your yard. Whether you are interested in grand scale models or water fountains for smaller areas, we have the ability to customize many of our water fountain designs to meet your specific needs.

We have CAD modeling and photo-editing capabilities to show you exactly what your fountain will look like before it’s produced. Our friendly, informed staff is ready and willing to help you create your fountain dream from start to finish. Designing custom water fountains is our specialty!

We Will Assist You Through

Design

Design ideas for using tiered fountains as a focal point in a courtyard or formal garden.

Size

Selecting the right size for your fountain so it will be proportionate to its surroundings and your home.

Location And Style

The main factors to consider when choosing the best location for a      fountain, including the style of   the property, whether you want to use your fountain as an accent or  a focal point, and the proximity to electricity for operating a water pump.

Maintenance

Important questions to ask before installing a water fountain, such as how much  maintenance will be required and how much sound does it produce.

Depending on the size, complexity and nature of the project, we work directly with architects,engineers, contractors and home owners. You give us your ideas, and together we design a fountain especially to suit your taste and needs. 

We encourage you to send in photos of your property arrangement to help us best help you choose a water fountain design which best suits your current landscape and architecture. When taking the photo, please try to keep the following things in mind:

Try to get your whole property in the frame, so we can see the ground, the building, and above your roof. Please place an item within the center of the area where you would like the fountain shown, and measure it’s height to give us a sense of scale. (It can be as simple as just pushing a shovel into the ground at that location, then telling us how tall the top of the handle is.)

1. Please fill out the form with the information mentioned below so we can contact you once your presentation is ready.

2. Take a photo of your proposed fountain location with a digital camera set on a fine resolution setting, so that you end up with a 1-2MB size file and send it to us at sales@carvedstonecreations.com, referencing your name/project information.

Click Here To Fill Out Our Form

Drawings or image files can be submitted as email attachments to sales@carvedstonecreations.com. Please specify a title for your job in the inquiry field on the form, in your email subject, and in the file name for clarity and keep attachments less than 15MB if possible. *Accepted file formats: CAD files, image files, Word, and PDF.

The Final Stages of the Water Fountain Design

When all of the pieces are fabricated, they are transported to the job site and assembled. During the assembly process the pumps, lights, drains, and electrical connections are installed. Upon completion the water fountain is tested for proper operation.

Whatever your challenge may be, we can help you turn your idea into the fountain of your dreams. 

All of the outdoor fountains from CSC are created with superior workmanship and weatherized materials, so that your outdoor work of art can last a lifetime without a need for expensive repairs or replacement parts; all you have to do is enjoy it, while we handle the full management process.

An outdoor water fountain adds a sense of elegance and sophistication to any space. Give your guests an amazing first impression. The outdoor fountains available at Carved Stone Creations come in a wide variety of themes, colors, and sizes. Take your backyard up a notch by designing outside of the box.


Why should you use Granite Fountains rather than cast stone or other types?

February 2, 2014

Why Should you use Granite Fountains?

If you live in the northern climates or an area with a freeze/thaw cycle, there is one large reason to use granite fountains or natural stone fountains. It’s a lot easier on you over the years, not having to disassemble your fountain to store it indoors over the winter, or worry about covering it so water doesn’t sit in the basin, or trying to fill/fix cracks that occur as you do with a concrete/cast stone or limestone fountain like this one.

DrawBacks of Limestone 

In warmer locations, limestone fountains like that shown above can be used with no appreciable ill effects for a fairly long time. That being said, granite still may be a better choice for you, as stones like limestone and sandstone inherently do not last as long as granite. It will also be based on the porosity of the stone itself, and how it will eventually wear away with the damage from the elements.

Our granite fountains can remain outdoors year-round to give you the inherent beauty of your fountain, even if it’s not actually running during the really cold part of the year.

As you can see, we keep our fountains running deep into the Wisconsin winters, and it results in some spectacular ice formations with no harm to the fountain itself!

Winter Weatherizing your Natural Stone Fountain is easy!

1. Just take the pump out of it, and drain/clean it so it’s ready for next years to use.
2. Drain your basin(s) and take the plugs out of them.
3. Depending on the kind of stone you have, you can either seal it whenever it needs it (typically once every year or two) or, you can just let it remain natural. (Sealing helps keep stains from occurring if you are in an area with high chemical concentrations in your water or natural elements like clay that could stain the stone.)

It’s that easy for you to have an object of beauty that will last for generations!

The only hard part will be deciding who to “will” your fountain to when the time comes…

So please contact us, so we can help you design a fountain to fit your budget, your decor, your style, and your life!


Stone Estate Fountain Design And Installation

October 28, 2012

Carved Stone Creations has a wealth of experience when it comes to designing and installing fountains. We have designed everything from wall fountains to large estate fountains and we can incorporate spray rings, additional sprayers, timers, lighting, recirculating pumps, and other features into your fountain as well. We carry many of the necessary pumps, hardware, and accessories in stock so everything is readily available for installation. A wide variety of fountains in different sizes and styles that can be seen in our online store or in person at our showroom. This article will focus on the design and installation of a large estate fountain.

After finding us on the web a Country Club near Little Rock, Arkansas contacted us about designing and making a fountain for them based upon a fountain from a Washington, DC park that was made in 1930.

Old Fountain in a Washington, DC park that was made in 1930, who’s design was re-created for a customer of ours in a Green Granite many years later.

Between our expert design team and skilled stone carvers, we were up to the challenge of faithfully reproducing the look of this fountain. In fact, many of our past clients have approached us about reproducing the design of a fountain, either because they want to replace an existing fountain on their property, or they fell in love with one they saw elsewhere. Our design staff works directly with architects, interior designers, and sometimes the homeowner themselves. They come up with custom designs that meet the look and style that the client is looking for.

In this case, the client was working with an important deadline. They needed to have the fountain done in time to debut it before an event happening on the country club grounds in late June. We rose to the challenge and had the fountain designed, produced, and installed. Almost 3 months to the exact day from when they first contacted us!

The design process of the fountain

As mentioned before the fountain was inspired by a fountain in a Washington, DC park that was built in the 1930’s. Using just the photographs you see below we faithfully recreated the design with our 3D modeling and engineering software and produced a replica of it.

Next, our design team created a full-size 3D model of the fountain and the surrounding wall. We create 3D models of most of our projects in order to accurately visualize the design to ensure that all of the components fit together properly during assembly. This also creates a set of technical drawings for our carvers that are thoroughly dimensioned and accurate. Here you can see the 3D model we created.

An Exploded view of the fountain.

Preparation for any fountain installation includes the pouring of a concrete pad. Following proper specifications ensures that the pad will support the weight of the fountain, minimize the potential for cracking and frost heaving in cold climates. All of the necessary access points for water lines and electrical sources for accessories are also included in this step.  

Concrete Fountain Slab

So here is the finished slab. You should notice 2 things in particular in this picture. One is the concave horseshoe depression on the surface of the cement. We recommend that a horseshoe-shaped depression is formed that is at least 1 below grade to allow for drainage as you see in the picture below of a finished fountain slab. This will ensure that your fountain drains properly. It will not retain stagnant water when it is not in use or when ice freezes over winter. See the pipes sticking out of the concrete? These are brass penetrations and PVC pipe that are set into the concrete to run water lines. Even if you don’t want accessories like lighting, or an auto-fill system initially. The cost of adding the penetrations when the slab is poured is much less than trying to add them later!

Fountain Installation

First, the surround pool walls are set into place using a high strength epoxy to adhere them to the concrete slab and to each other. We use shims to maintain a consistent gap between the parts as well.

Once the base pedestal was installed it was time to lower the large fountain bowl into place. Notice the PVC pipe in the center of the base which will feed the fountain sprayer nozzle. Once the fountain was in place it was time to hook up the pump and the accessories you see in the picture below.

The Autofill system is fed water from the home or a sprinkler system water line. It constantly monitors water levels and automatically ads water as needed. This keeps the water level at an appropriate level and helps to prevent the pump from burning out due to water starvation. The pump itself is run from a standard high voltage wire. We cap the penetration with a threaded and glued fitting and use an Underwater Disconnect Coupling to supply power to the pump. This way you can simply lift the disconnect out of the water and shut down the pump without having to drain the surrounding pool to turn it off. For low voltage LED lighting we typically install a junction box. On top of the penetration and feed wire from it to the lighting. In the next picture, you can see the wiring is hooked up to the junction box. In order to get the fountain spraying the desired geyser-like plume of water a 2 diameter brass nozzle and a high flow water pump was used. Here you can see the nozzle head itself. 

 The Finished Result

While this fountain was relatively simple in design and size, we are able to design and install much larger and more complex fountains as well.

Looking for someone to design and install a fountain for you?

Carved Stone Creations is located in Kaukauna, WI and we are a reasonable drive away from many Midwest metro areas including Milwaukee, Madison, Chicago, Indianapolis, Fort Wayne, Minneapolis, St. Paul, Grand Rapids, Ann Arbor, Traverse City, Davenport, Des Moines, St. Louis, Kansas City, Cincinnati, and Columbus. Visit our showroom to see first hand what we can design for you. Our convenient centralized location also means we can bring all of the tools. All the heavy equipment we need to tackle any installation job.

We understand the effect our harsh Midwest winters can have on exterior stonework. We design and install architectural stonework like fountains, statues, exterior stone veneer, etc with those factors in mind. We’ll make sure the stonework we install for you stands up to the weather and the test of time! Outside of the Midwest? We can install there too. We have done work from New York to Florida to California as well.


How to Prepare a Concrete Slab for a Fountain Installation

June 22, 2012

Thinking about adding a fountain to your garden or yard and wondering what kind of preparation is needed to have one installed?

This article shows the process of pouring a concrete slab for a fountain installation and how to set up access points for water lines and electrical power for the fountain pump and accessories such as lights. It’s important that the builder or contractor pouring the concrete for your fountain slab follows these guidelines to ensure that the concrete pad is poured properly and up to spec to support the weight of your fountain and that the access points for water lines and electrical power to run your fountain pump and additional lighting are included.

Let’s look at preparation for pouring concrete first. Compact the soil and then add a 6″ base of compacted gravel as your base. The compacted gravel is important because it drains water quickly and can have a greater load-bearing capacity than soil. The Gravel base will have a lesser potential for frost heave then regular soil.

Next, apply a 2″ barrier of Rigid foam insulation over the gravel. We recommend Owens Corning Foamular 250 Insulation Foam Sheets in 48″ x 96″ or 108″ sizes. The insulation helps to retain heat in the sub-grade soil and protect the slab from moisture beneath it. This helps to prevent frost heave in freezing climates. We recommend that you extend the insulation at least 12″ past the edge of the slab. In addition to the insulation benefits, it also creates a convenient means for locating pipes etc. and holding them in place before the concrete is poured.

Finally layout a grid of ½” Rebar with a 12″ on center pattern 2″ above the foam surface. The rebar adds structural support to the concrete and minimizes the potential for separation and damage from cracking. Here’s an example of a typical fountain slab installation and concrete water fountain molds before the cement has been poured:

Before the cement is poured you need to add your PVC drain pipe and penetration pipes for running your water lines and electrical power sources for the fountain.

We recommend a 3/4″ Brass Penetration as you see in the picture below:

Threaded ends on both sides allow the PVC tubing to be attached to the base and for threaded and glued fittings to connect and seal the wiring at the top. Make sure the penetration is grounded to rebar as well. You can do this by sliding the wire through the brass lock down clamp indicated with the arrow. In the picture above, or by bolting the wire with the stainless steel bolt provided.

In the image below we created a simple diagram of how the penetrations should be installed:

As you can see in the picture, we recommend setting the penetration base plate 2″ below the top surface of the concrete. Here’s a diagram of how the PVC Drain should be installed:

Now the slab should be prepared to pour cement! We recommend using 4,000 Psi cement with Fibermesh additive. Fibermesh is essentially strands of synthetic fibers mixed into the cement (like fiberglass strands in resin) to prevent shrinkage during curing and cracking. Pour the fountain slab to a 6″ thickness (more if the diameter is 20′ or greater).

Another important design feature to consider is creating a concave depression in the concrete to allow for water to drain properly. We recommend that a horseshoe-shaped depression is formed that is at least 1″ below grade to allow for drainage as you see in the picture below of a finished fountain slab. This will ensure that your fountain drains properly and will not retain stagnant water when it is not in use or ice over winter.

This can be created by attaining a flat surface on the wet cement. Then remove cement by shovel until the depression is created and troweling it smooth again.

Once you have the concrete poured and thoroughly set for at least 7 days (concrete takes an average of 21 days to fully cure), seal the edges of the penetrations and the drain with DECK-O-SEAL Sealant.

After we set the curb surround with epoxy we seal the joints with a similar DECK-O-SEAL caulk.

And there you have it, should your contractor follow these steps. You should have a properly prepared concrete slab to install your fountain on. Here’s a picture of our crew installing a fountain on the slab you saw above.

We typically include 3 penetrations in the fountain slab to accommodate waterlines from the home. For sprinkler system to run an autofill system, a standard high voltage wire to power the fountain pump, and an additional low voltage wire to power fountain lights. Even if you don’t desire to add an autofill system or lighting initially. We highly recommend that you have the penetrations included when the slab is poured. It will be much less expensive to have them included at this stage rather than coring out the concrete and adding them at a later date! Here you can see the fountain with the pump and lighting features installed.

The Autofill system is fed water from the home or a sprinkler system water line and it constantly monitors water levels and automatically ads water as needed. This keeps the water level at an appropriate level and helps to prevent the pump from burning out due to water starvation. The pump itself is run from a standard high voltage wire. We cap the penetration with a threaded and glued fitting and use a power disconnect coupling to supply power to the pump. This way you can simply lift the disconnect out of the water and shut down the pump. Without having to drain the surrounding pool to turn it off. For low voltage LED lighting we typically install a junction box on top of the penetration and feed wire from it to the lighting. High voltage wire will be needed for halogen lights.

Note: Please DO NOT attempt to pour the concrete slab on your own! This should only be done by an experienced builder or contractor. Consult with appropriate trades to make water and electrical connections to the home. If there are potential concerns with the stability of the soil due to the water table, etc. Then consult with a civil engineer beforehand.

We often work directly with architects and builders on our projects and we supply them with detailed drawings for slab construction like the example you see below. These drawings are also available for the fountains that we have in inventory on our gallery as well.

Still, have questions regarding how to properly set up your concrete slab? Call us at 866-759-1920 or contact us for further instruction.

Looking for someone to design and install a fountain for you? Carved Stone Creations is located in Green Bay, WI. We are a reasonable drive away from many Midwest metro areas including Milwaukee, Madison, Chicago, Indianapolis, Fort Wayne, Minneapolis, St. Paul, Grand Rapids, Ann Arbor, Traverse City, Davenport, Des Moines, St. Louis, Kansas City, Cincinnati, and Columbus.

Visit our showroom to see first hand what we can design for you. Our convenient centralized location also means we can bring all of the tools and heavy equipment. That we need to tackle any installation job. We understand the effect our harsh Midwest winters can have on exterior stonework. We design and install architectural stonework like fountains, statues, exterior stone veneer, etc with those factors in mind. We’ll make sure the stonework we install for you stands up to the weather and the test of time! Outside of the Midwest? We can install there too. We have done work from New York to Florida to California as well.


Self-Contained Water Fountain Installation

April 30, 2012

Want a fountain for your landscape or garden but don’t want a large pool and stone surround beneath it? Our years of experience designing and installing fountains has allowed us to perfect installing fountains in many different ways.

This article will focus on installing a self-contained water fountain with an auto-fill sump reservoir.

So just what is a self-contained fountain?

Self Contained Wild Rose Granite 3-tier Classical Fountain

A self-contained fountain is designed with a bottom bowl which catches the water that cascades from the upper tiers and recirculates back up the fountain via a water pump placed in the bottom bowl. This eliminates the need for the fountain to sit in a pond or large pool where the water falls into.

Here’s an example of an installed self-contained fountain while running.  

While they are certainly a beneficial design from a space-saving standpoint, they still have some shortcomings. A traditional fountain has a much greater pool of water to draw from then a self-contained fountain. Self-contained fountains may not have a very deep pool of water to draw from, and this is a disadvantage because if the water level drops too low it will put the pump at risk of burning out if begins sucking in air. While a self-contained fountain will lose only a minimal amount of water from spillage by design, it will be at greater risk of water evaporation. This means that you will have to monitor the fountain regularly to make sure that you maintain a suitable water level. So what can you do to avoid this problem?

Our years of experience in installing fountains has taught us some useful tricks. Here at Carved Stone Creations, we have come up with a great solution for installing self-contained water fountain. Rather than placing the pump in the bottom bowl of the fountain, we feed the water line from the fountain into a sump reservoir where an auto-fill pump and a separate water line fed from the house or a sprinkler system constantly fill and monitor the water supply for the fountain. This allows your fountain to be nearly maintenance free! No need for checking the water level of the fountain frequently. This also reduces the potential for debris like leaves and algae growth from blocking the water pump inlet or being sucked into the pump. You’ll still need to clean your fountain, but you won’t have to worry about water inlet blockages.

So how do we set this system up? Let’s take a look at the installation process:  First, we take a concrete riser base (which will be covered by landscaping mulch or gravel after installation is complete) and cut a groove in it to run the PVC water line to the fountain.

Next we dig a hole for our sump reservoir. The reservoir will remain out of sight in the ground once the installation is finished.

Next, we assemble PVC pipe which will act as the return line for the water in the bottom bowl and run the flexible tube through the PVC to feed water to the top of the fountain which will in turn cascade water over the upper tiers.

The base of the fountain is carefully lowered over top the riser and the water line is fed through the hole.

After this, each part of the fountain is lowered in place and adhered together with high strength epoxy.

Here are the water return line and the Aut0-Fill regulator installed in the reservoir

Here you can see the reservoir is filled. The Auto-Fill regulator will constantly monitor the water level and add water to the sump as needed.

Here’s the sump with the cover in place. It can be easily accessed and opened to maintain the pump if it is covered with a loose landscaping rock.

Here you can see the inside of the cavity in the pedestal above the bottom bowl. The hole is sealed beneath the PVC pipe and the PVC thus acts as the drainage point for water that will return to the sump and recirculate water throughout the fountain.

A simple cover piece wedges in place to conceal the opening.

And here is the finished result. A beautiful, low maintenance fountain that won’t take up a lot of space in your landscape and will run efficiently.

We can put our expertise to work for you. We can design and install virtually any type of fountain you desire including disappearing fountains and large estate fountains.

Inspired to add something similar to your home?

Let us be your source for a new fountain in the Midwest. Carved Stone Creations is located in Kaukauna, WI. We are a reasonable drive away from many Midwest metro areas including Milwaukee, Madison, Chicago, Indianapolis, Fort Wayne, Minneapolis, St. Paul, Grand Rapids, Ann Arbor, Traverse City, Davenport, Des Moines, St. Louis, Kansas City, Cincinnati, and Columbus.

Visit our showroom to see first hand what we can design for you. Our convenient centralized location also means we can bring all of the tools and heavy equipment we need to tackle any installation job. We understand the effect our harsh Midwest winters can have on exterior stonework and we design and install architectural stonework like fountains, statues, exterior stone veneer, etc with those factors in mind. Well, make sure the stonework we install for you stands up to the weather and the test of time! Outside of the Midwest? We can install there too. We have done work from New York to Florida to California as well.